

Table of contents


No headings in the article.
Hi techies! In this post, I'll be walking you through how you can easily add the Google Sign-In authentication feature to your React project.
So getting started, here is a quick rundown of what we'd be doing...
Bootstrap React Template
Installing dependencies
Organizing Folder Structure
Without further ado, let's get started. In order to achieve the first step, we need to ensure we have Node.js up and running on our machine, and we can simply verify that by running the following command on the terminal node -v or node --version as shown below, which should output the version of the node we have installed. You can download at the official site Node.js and install then verify that it is properly installed by running the command node -v
node -v
> 18.12.1
For the purpose of this tutorial, we will you Visual Studio Code VSCode it's become so popular among developers. Now we bootstrap React template, and in this tutorial, we will use Vite to download the React template we would be using in this tutorial guide.
Open your VSCode terminal and type in the following command npm create vite@latest my-react-google-signin-app --template react then press enter and follow the steps afterward. This will create our project folder and bootstrap the React template for us. Simply follow the prompt afterward.
npm create vite@latest my-react-google-signin-app --template react
The running development server should look like this

Next step, we need to install all the dependencies we would use in our project. In the terminal, run the following command npm i react-router-dom firebase react-helmet-async react-error-boundary to install react-router-dom, firebase, react-helmet-async, and react-error-boundary respectively. The react-helmet-async would be used to optimize SEO performance in our application while react-error-boundary as the name implies would to used to create an error boundary.
npm i react-router-dom firebase react-helmet-async react-error-boundary
After successfully installing those, now we need to organize our project files into folders for easy maintenance. In the root folder of our project, locate the src folder and create these folders, which we would use to house and organize our files into: components , config , pages , and routes.
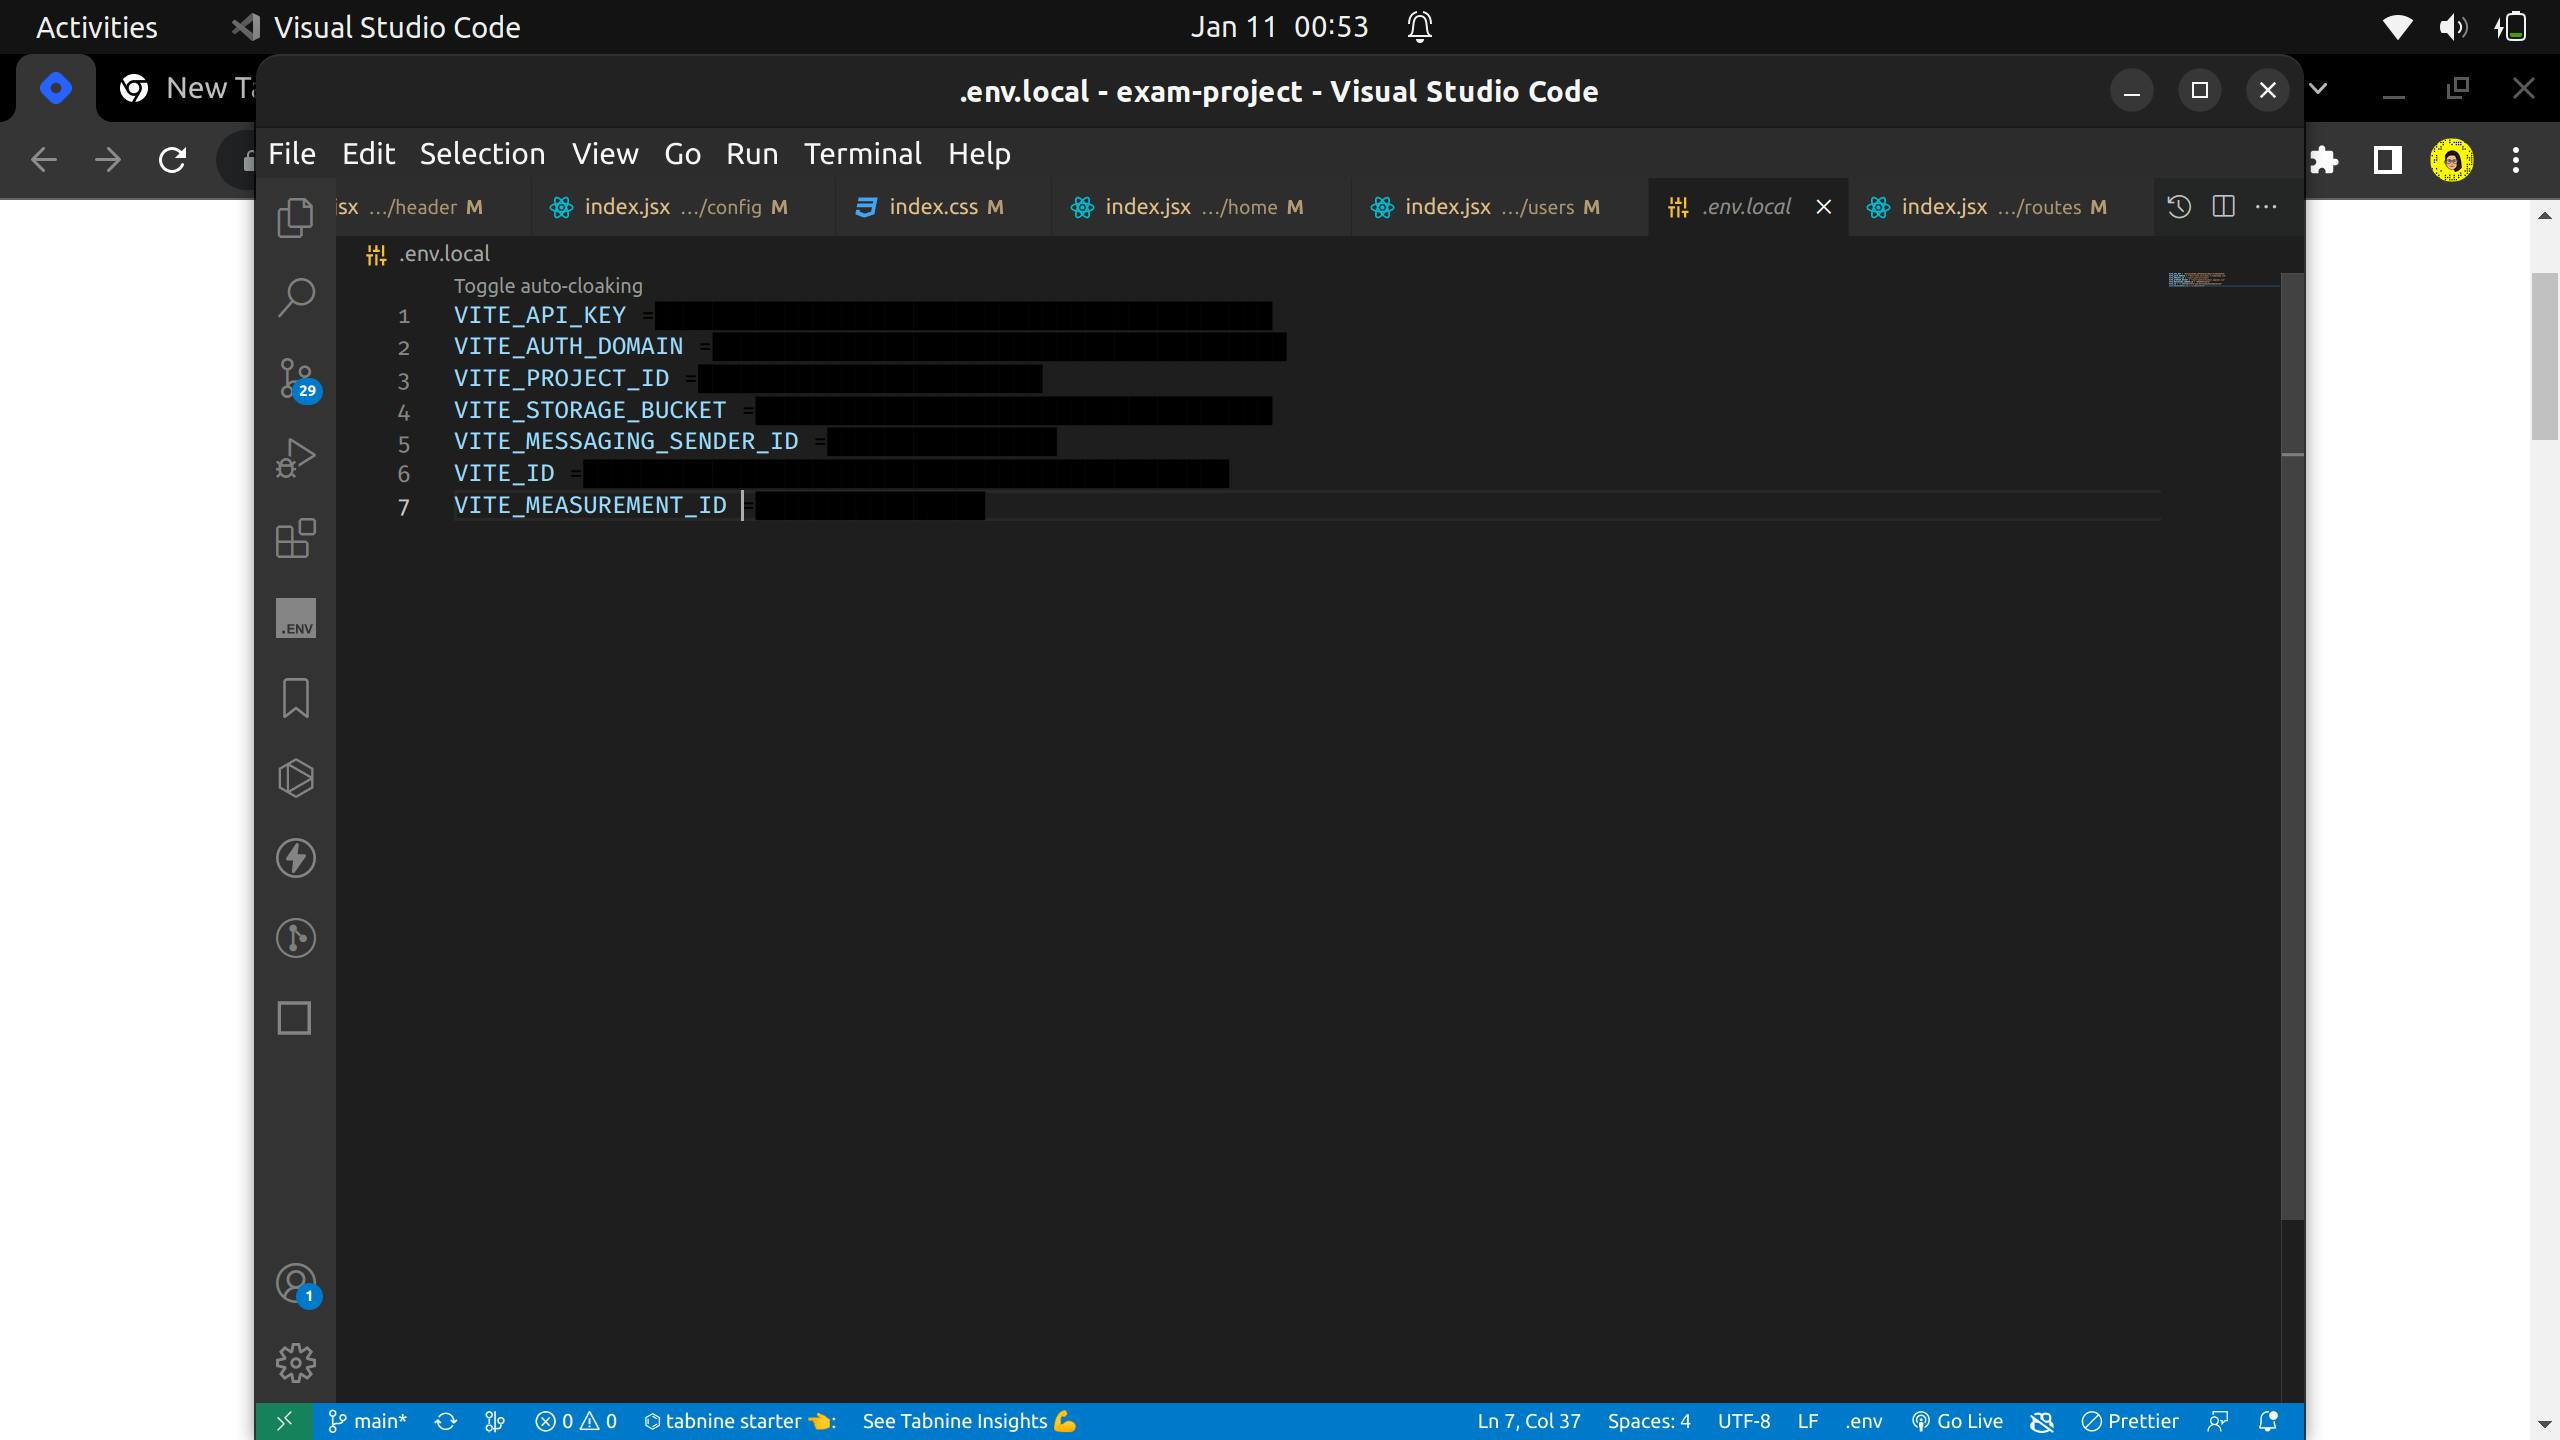
In the root folder of our project, create a file that goes by the name .env.local. Here, we will keep all our secret keys and later call them in a special way for use in the files we want to use them. Because this is a vite project, we name each key in key value pair following the format shown in the image below in the format VITE_API_KEY= "xyz"
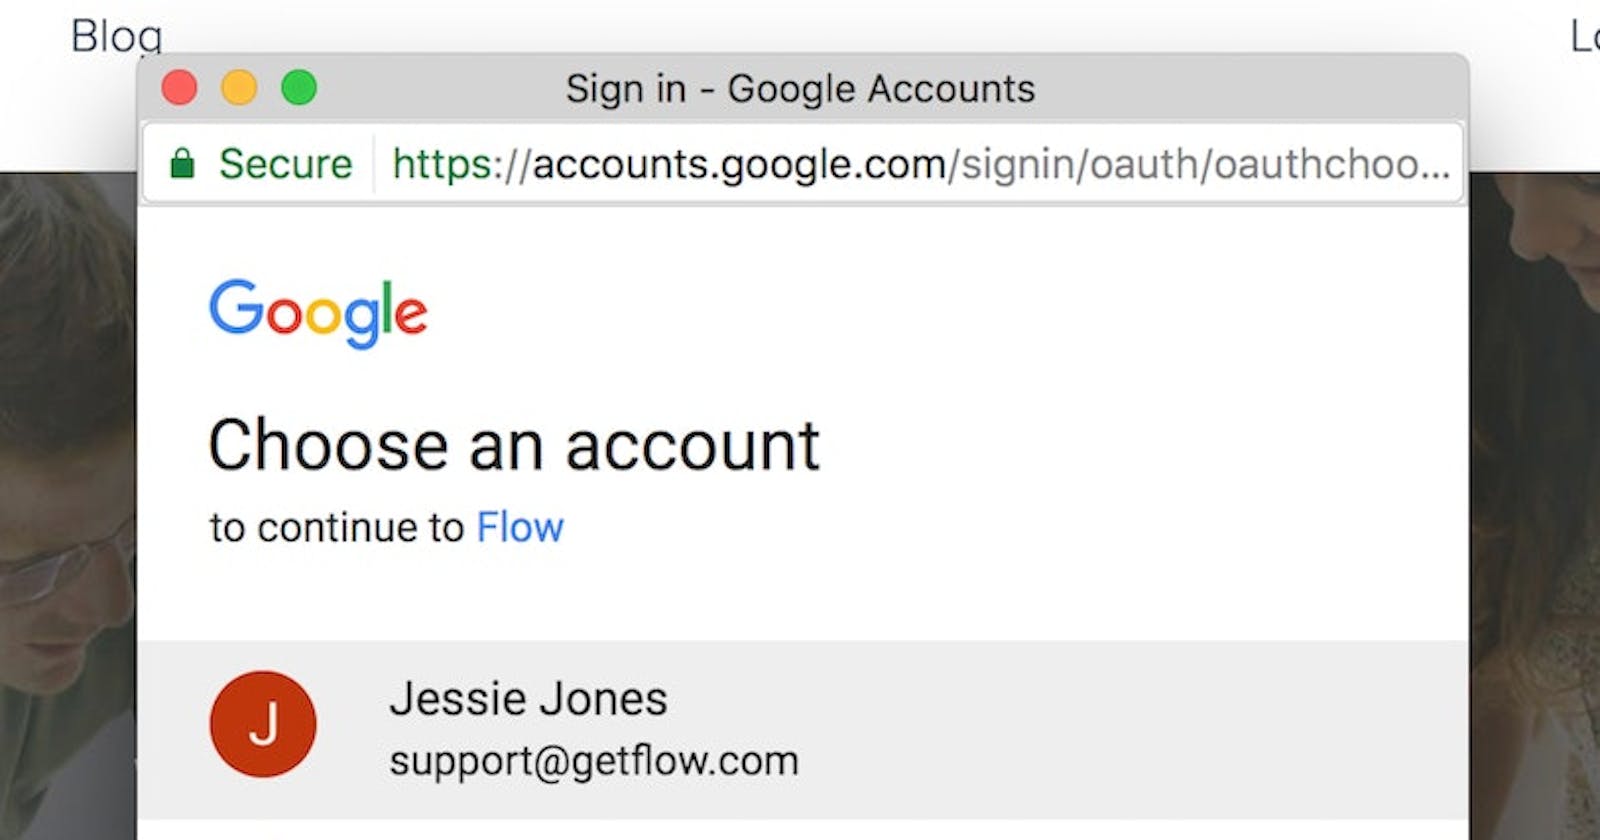
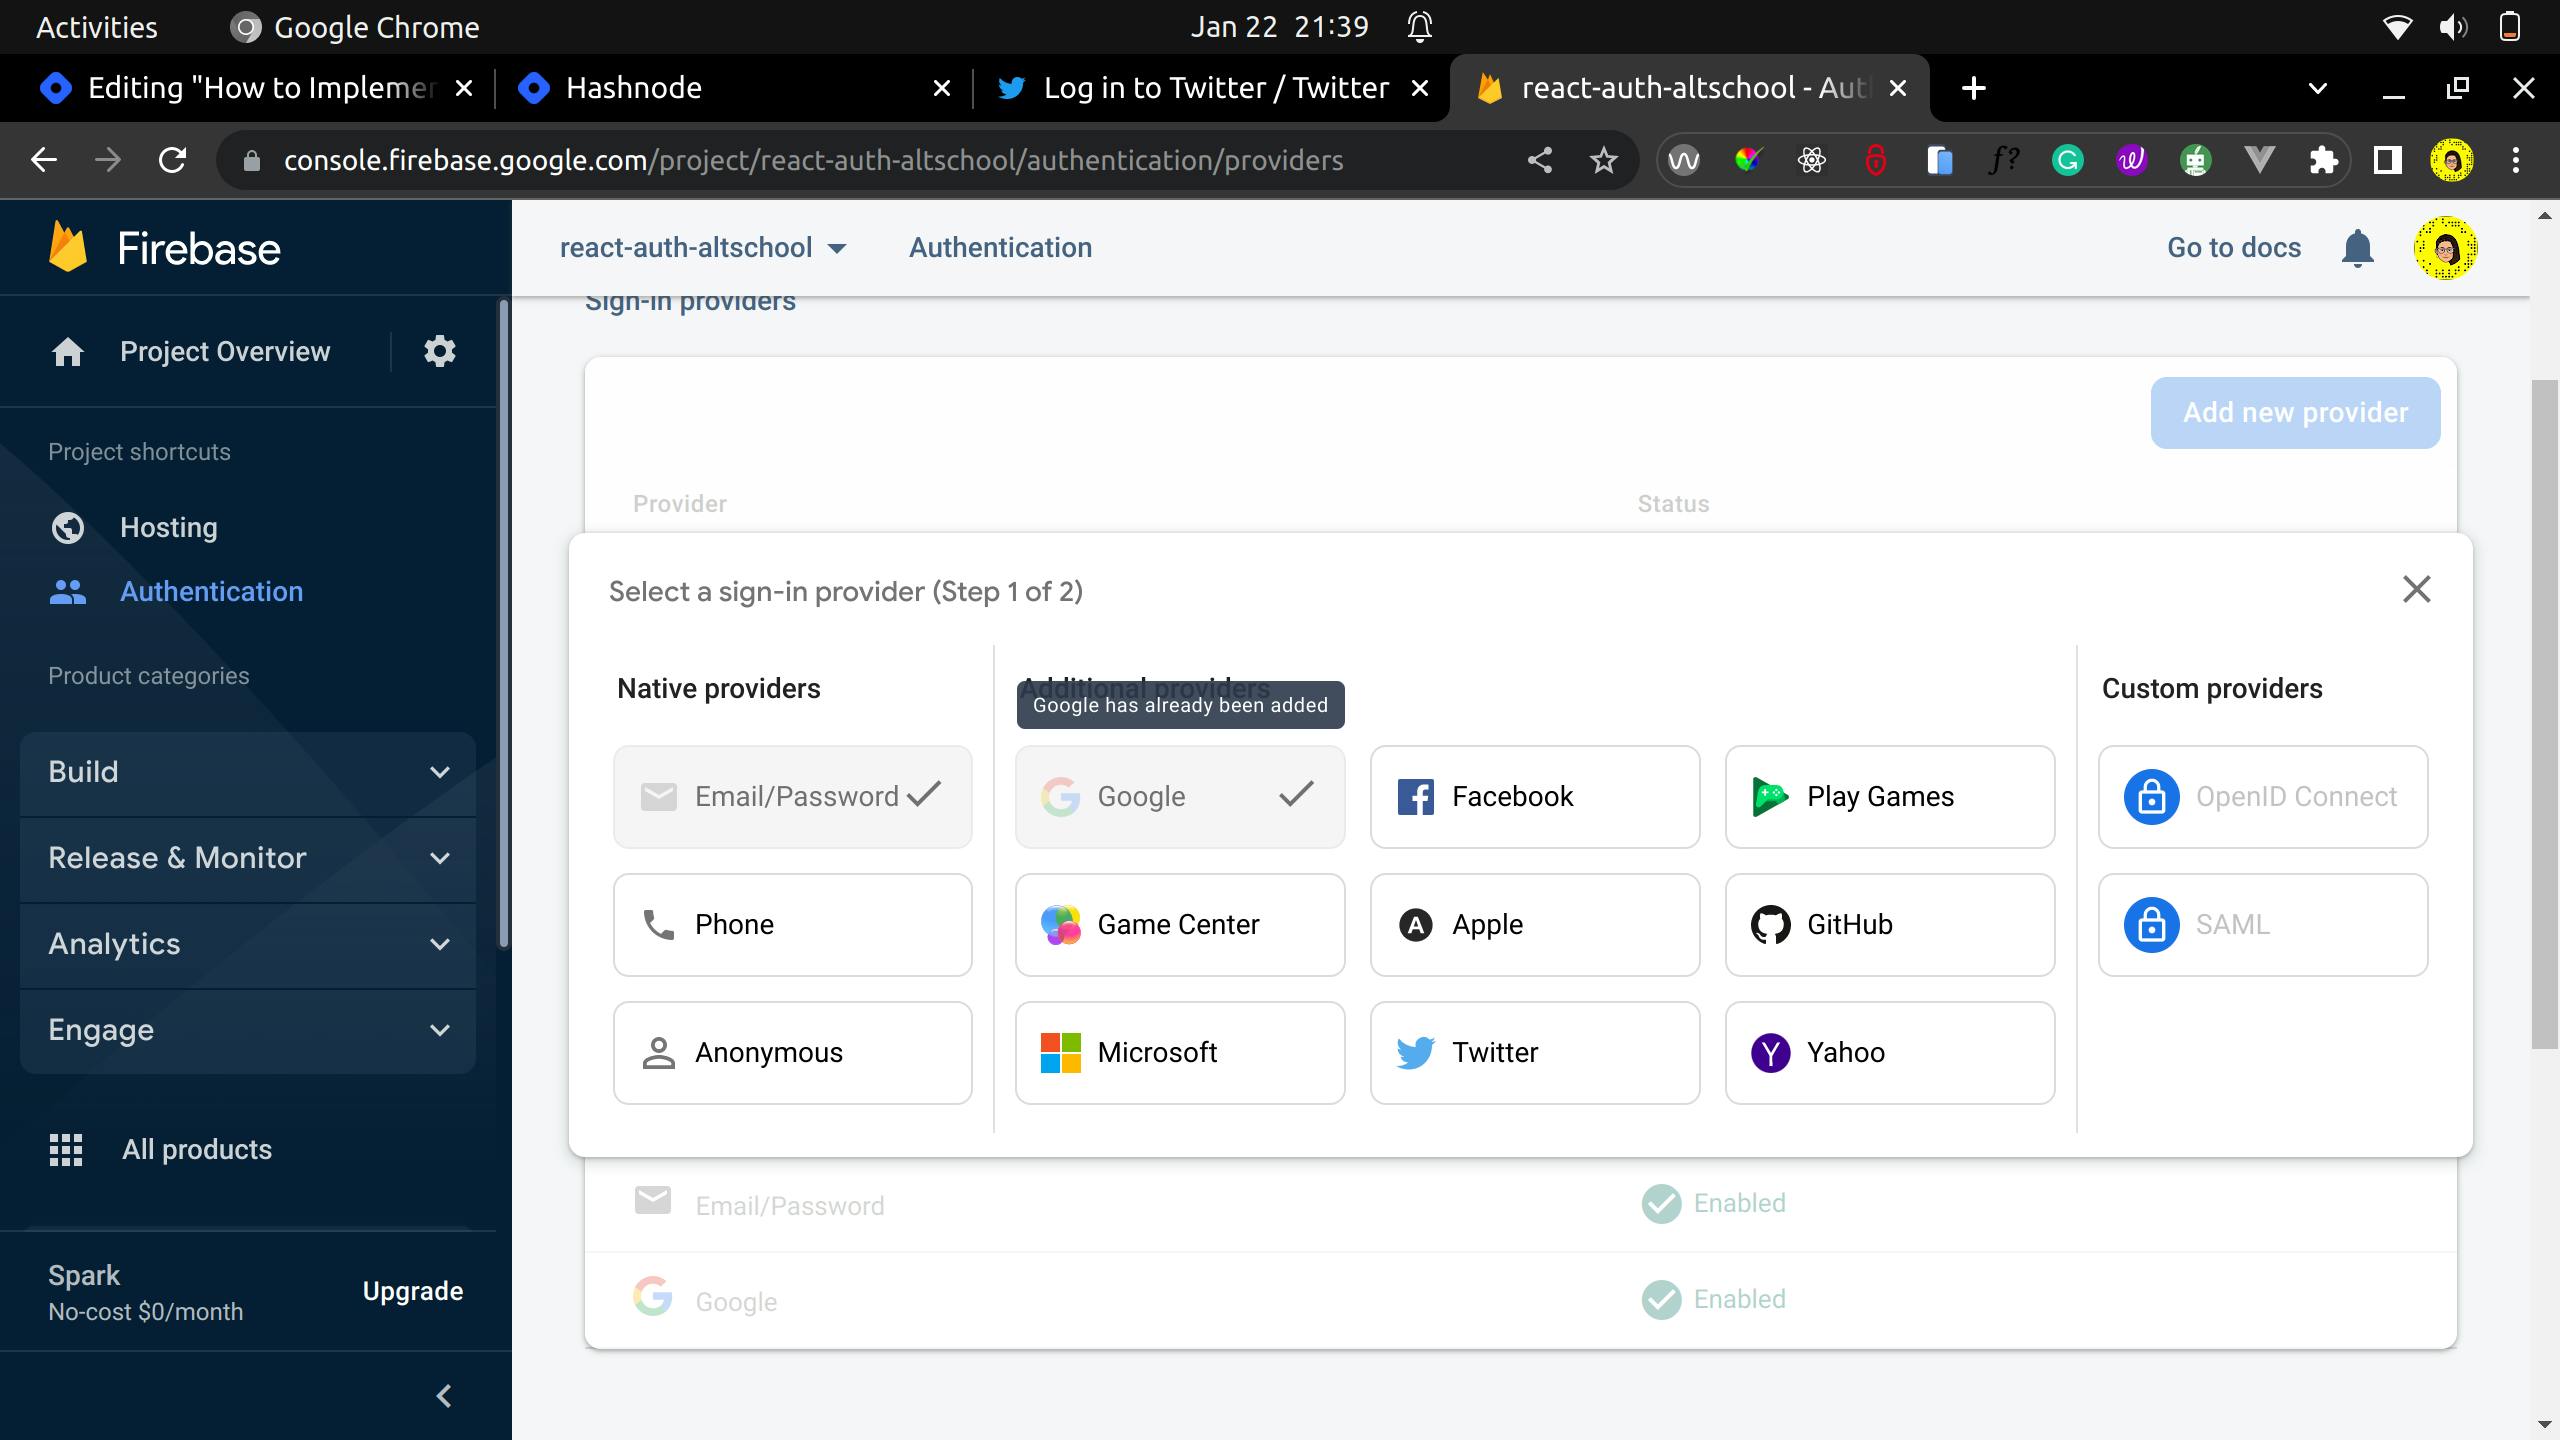
We'll be using Firebase Google Authentication for the project. So head to firebase to create an account if you do not have one, and then go to the firebase console. Locate the authentication tab on the side menu, create a Firebase project, and follow through with the prompts on the setup. Then, under the authentication section, select the sign-in method tab and add Google and any other form of provider you would want in your React project. Ensure you follow through with the prompts , locate Go to Docs to follow instructions on setting up firebase with your react project.
Inside the config folder, create an index.jsx file and paste in the code below.
// Import the functions you need from the SDKs you need
import { initializeApp } from "firebase/app";
import {
  GoogleAuthProvider,
  getAuth,
  signOut,
  signInWithPopup,
} from "firebase/auth";
// import { getAnalytics } from "firebase/analytics";
// TODO: Add SDKs for Firebase products that you want to use
// https://firebase.google.com/docs/web/setup#available-libraries

// Your web app's Firebase configuration
// For Firebase JS SDK v7.20.0 and later, measurementId is optional
const firebaseConfig = {
  apiKey: import.meta.env.VITE_API_KEY,
  authDomain: import.meta.env.VITE_AUTH_DOMAIN,
  projectId: import.meta.env.VITE_PROJECT_ID,
  storageBucket: import.meta.env.VITE_STORAGE_BUCKET,
  messagingSenderId: import.meta.env.VITE_MESSAGING_SENDER_ID,
  appId: import.meta.env.VITE_ID,
  measurementId: import.meta.env.VITE_MEASUREMENT_ID,
};

// Initialize Firebase
const app = initializeApp(firebaseConfig);
const auth = getAuth(app);
const provider = new GoogleAuthProvider();

export { auth, provider, signOut, signInWithPopup };